Audience List Setup
1. You will first need to create an Audience list and tag is as an Interest List.
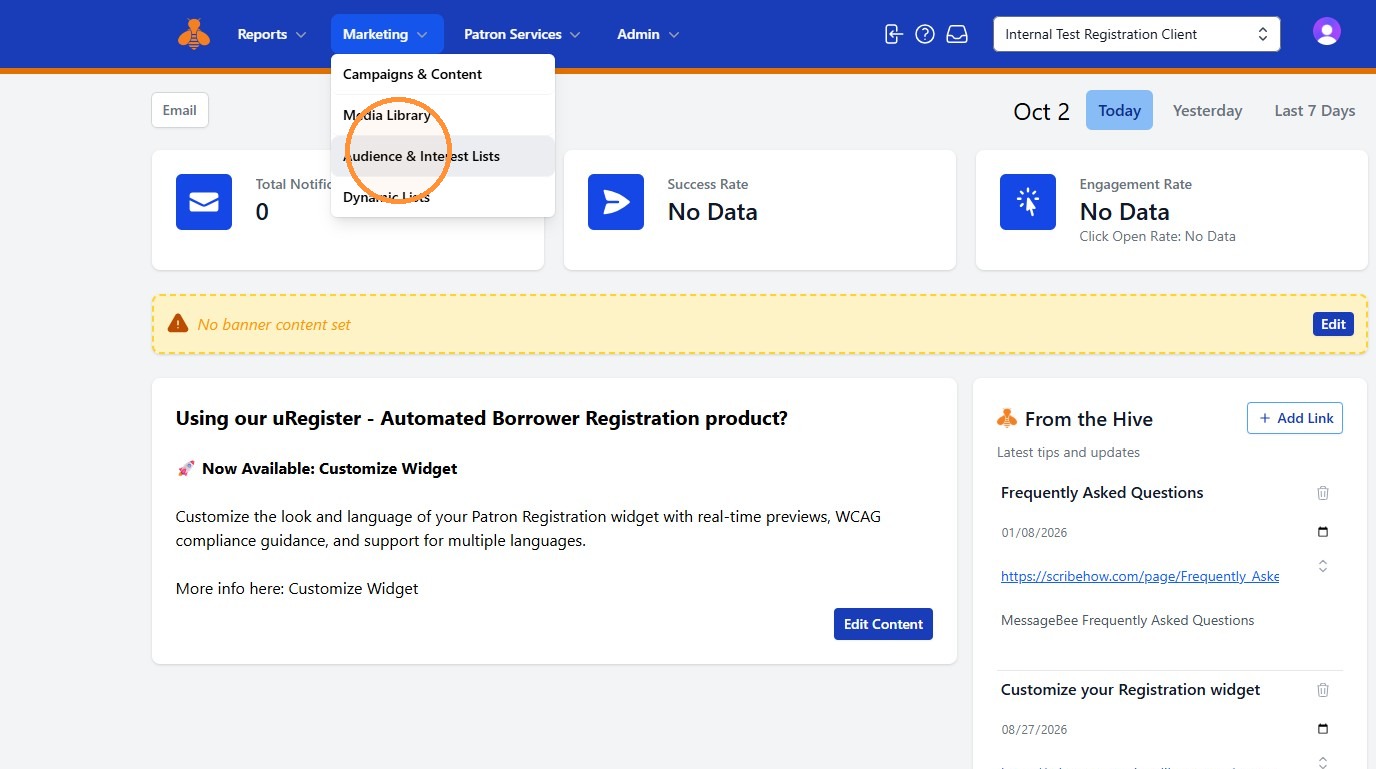
Navigate to Marketing →Audience & Interest Lists.
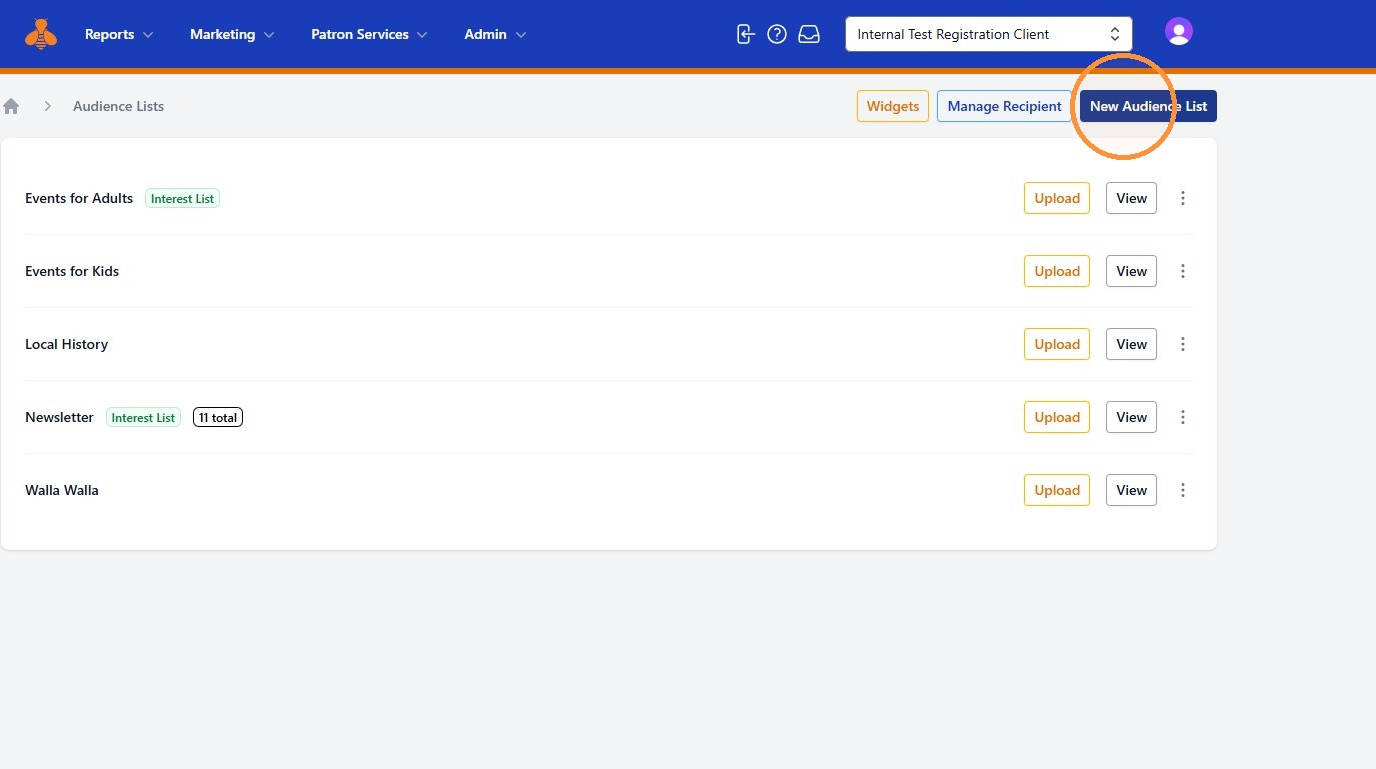
2. Click "New Audience List"
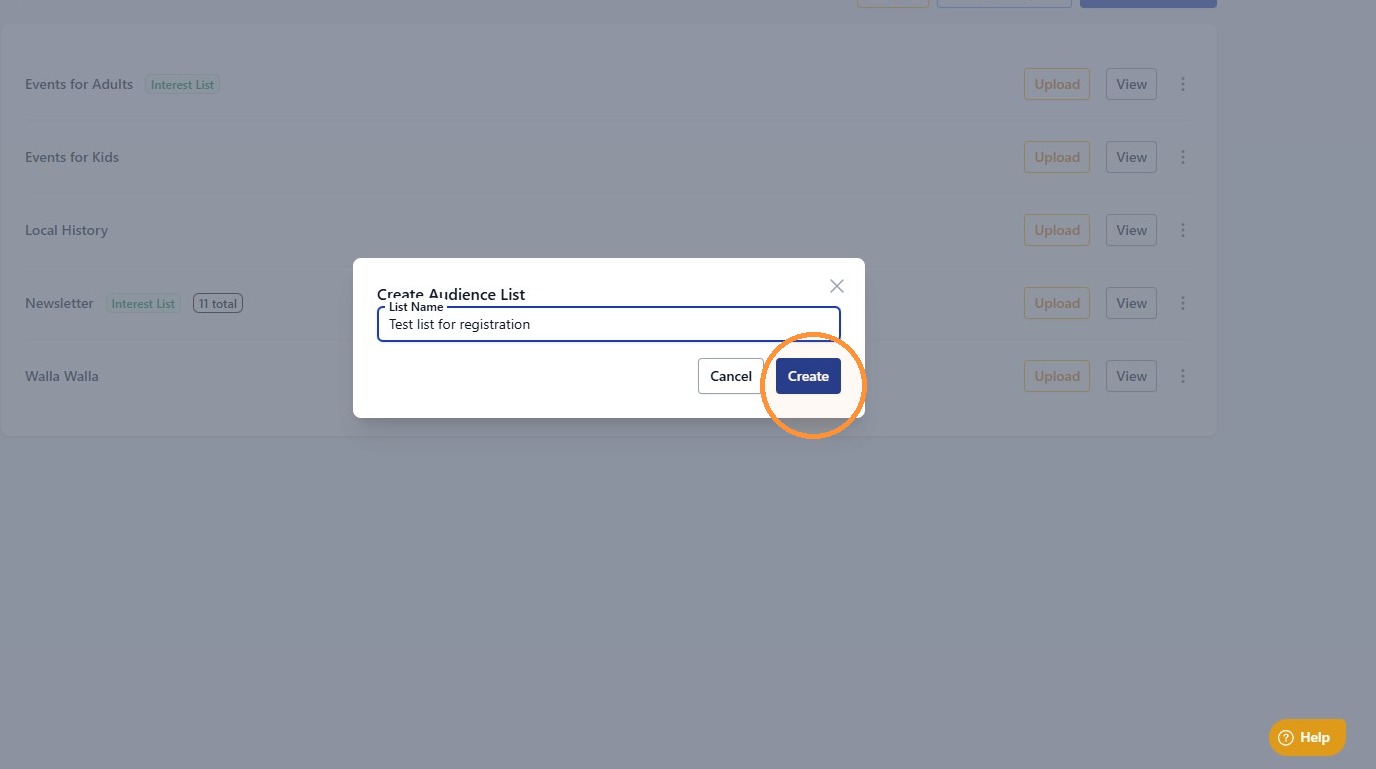
3. Enter a name for the Audience List and click "Create".
4. Next, you will want to designate the Audience List as an Interest List. Click the three-dot menu and selecte Interest Settngs.
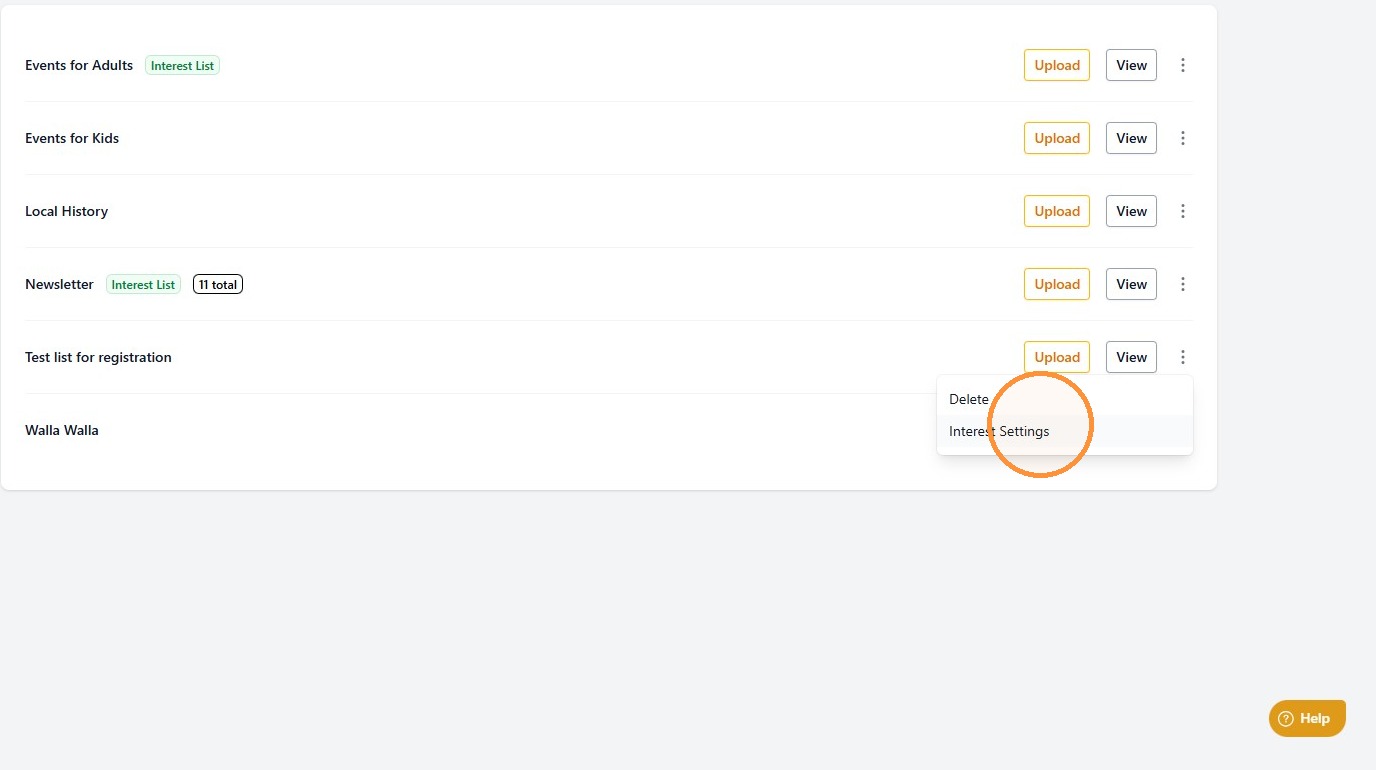
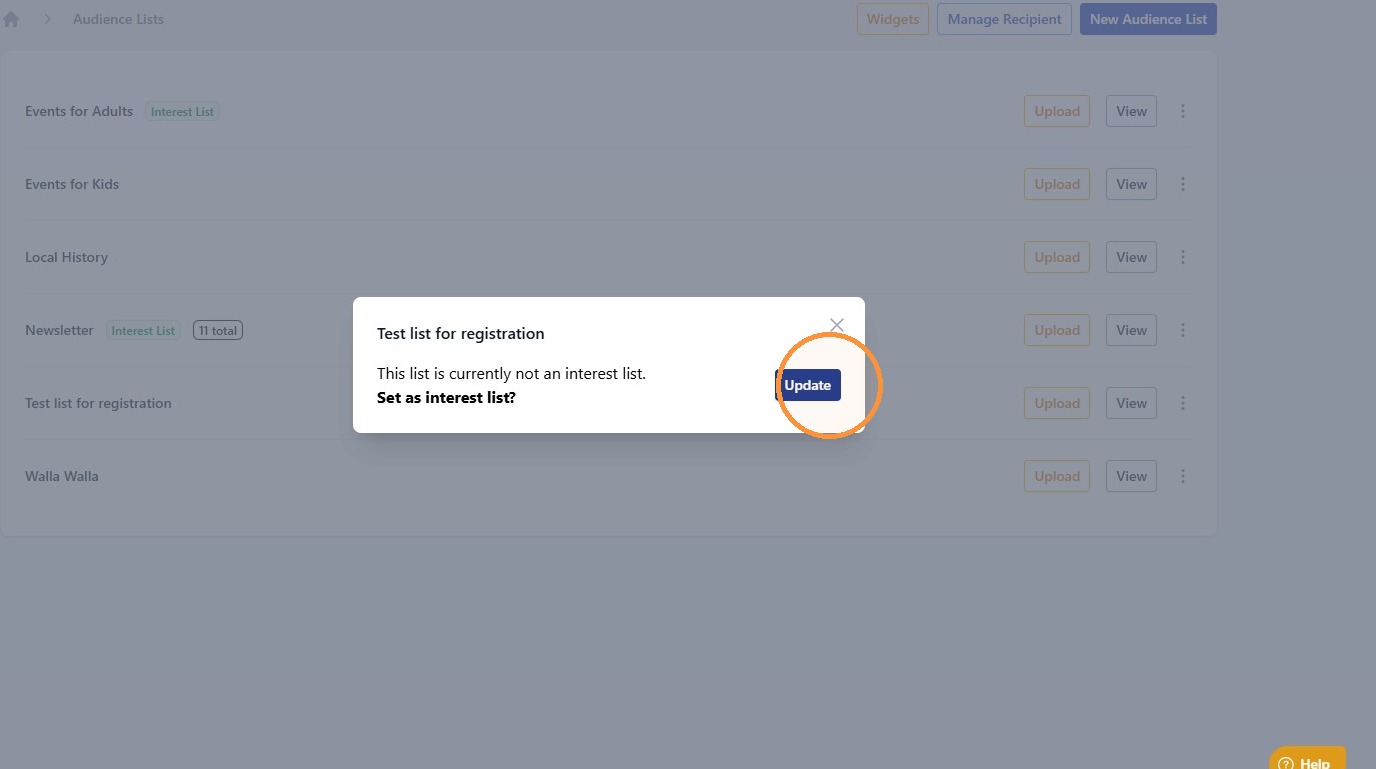
5. You will be asked if you would like to set this list as an Interest List. Click "Update" to finalize the request.
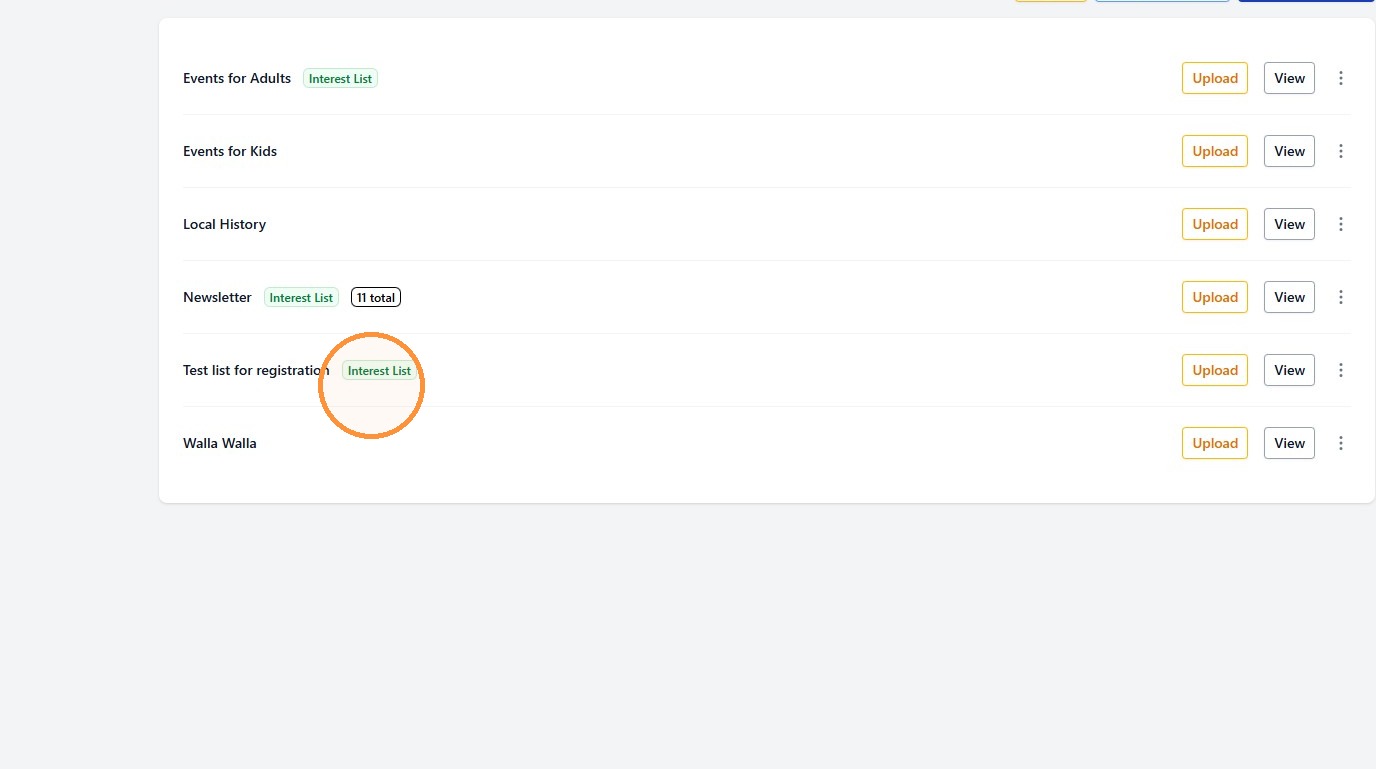
6. Once complete, a green "Interest List" label will appear next to your designated Audience List.
Tip!
To remove the Interest List designation at any time, click the three-dot menu for the list and confirm that you would like to revoke its Interest List status.
Widget Creation
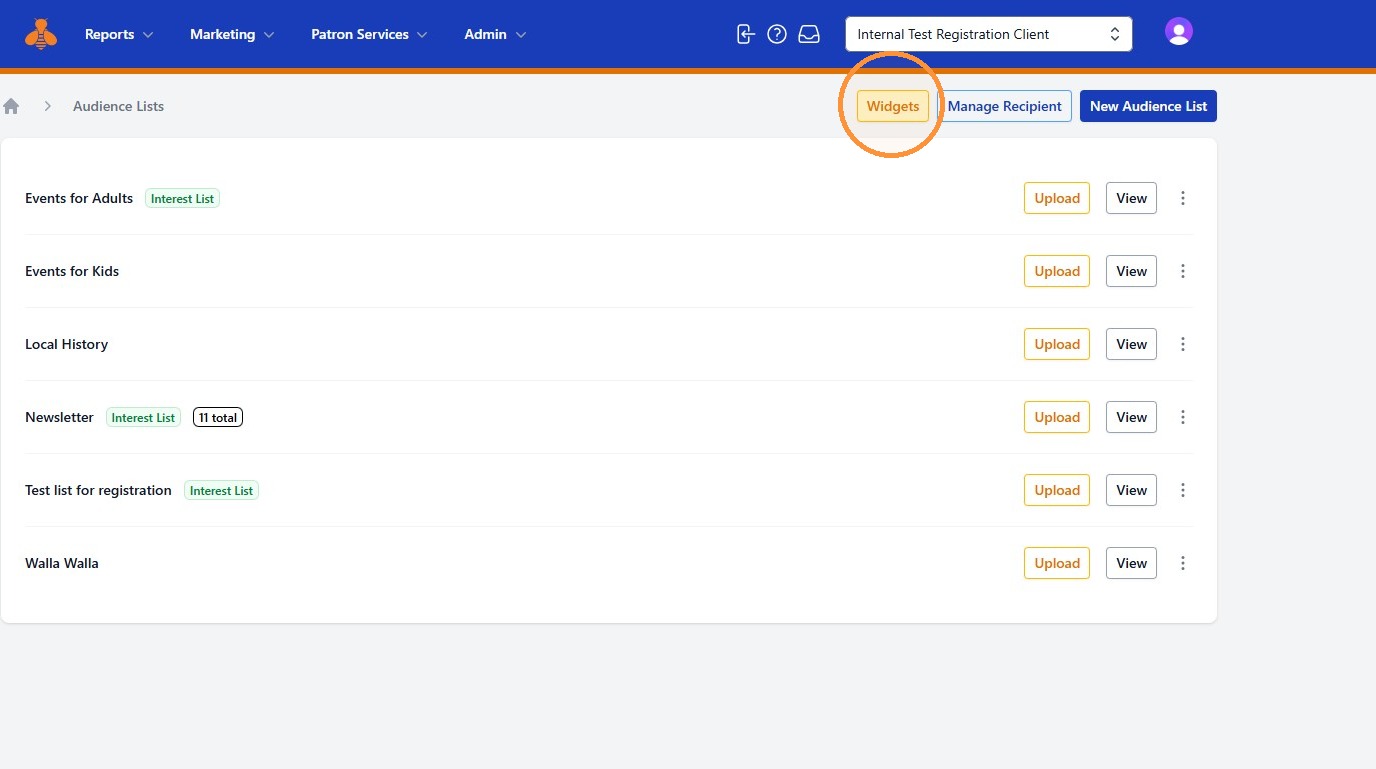
7. Next you will need to create a widget. To so, click "Widgets"
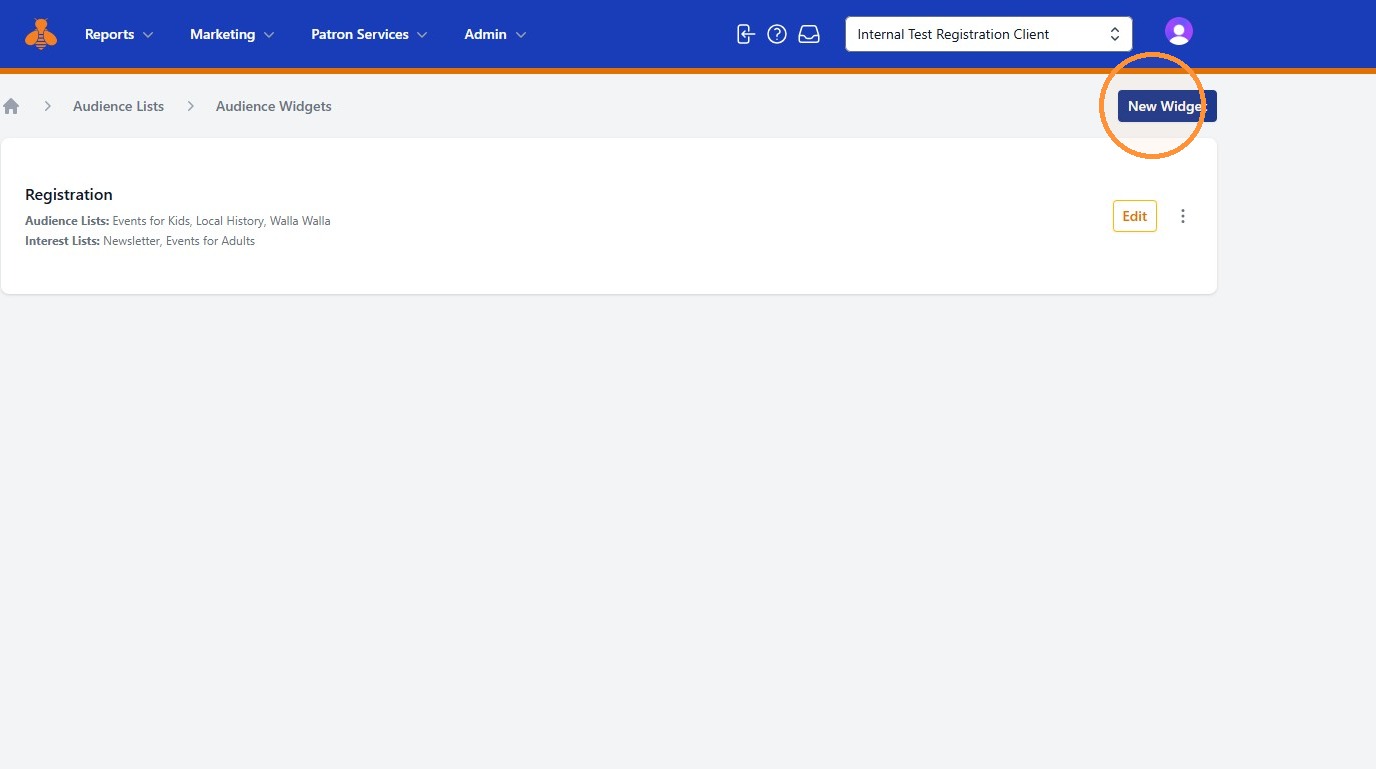
8. Click "New Widget"
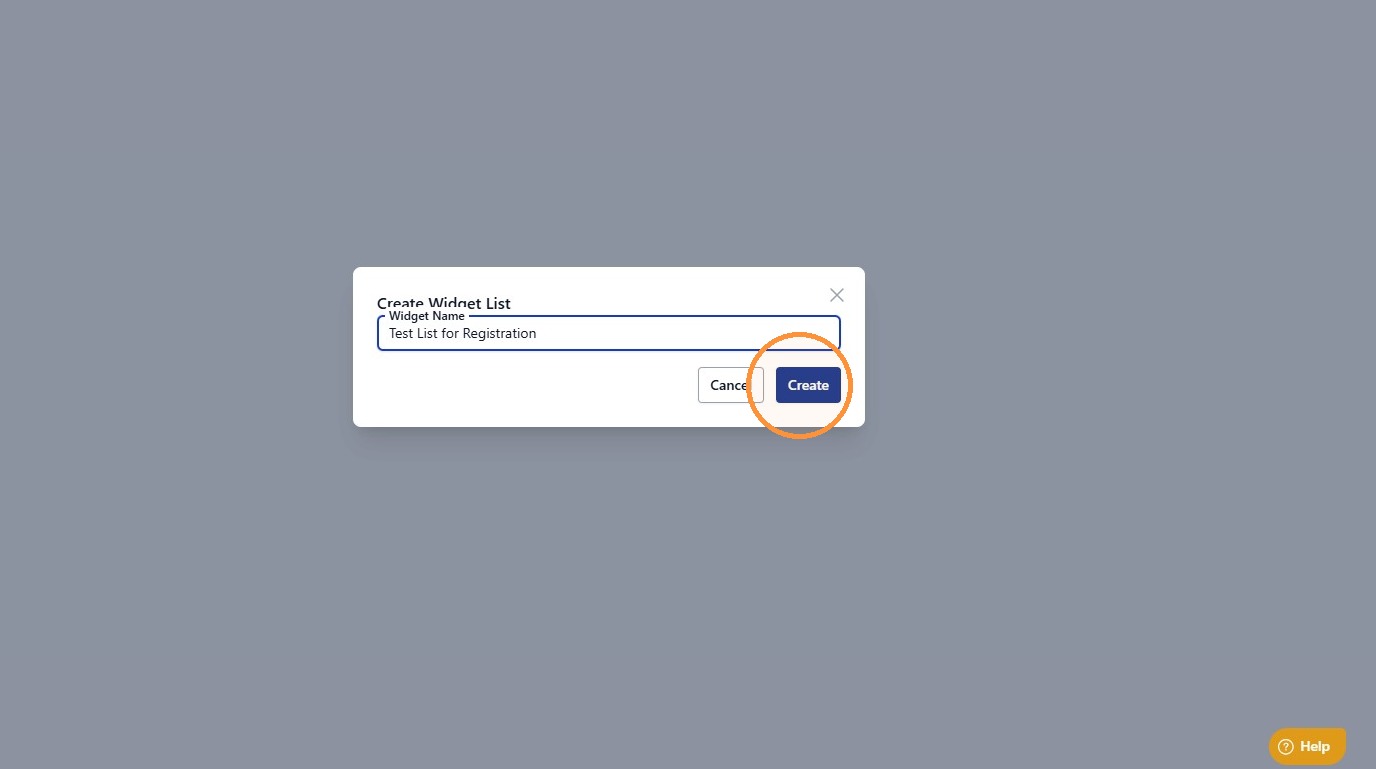
9. Enter the desired name of your widget, then click "Create"
Widget Configuration
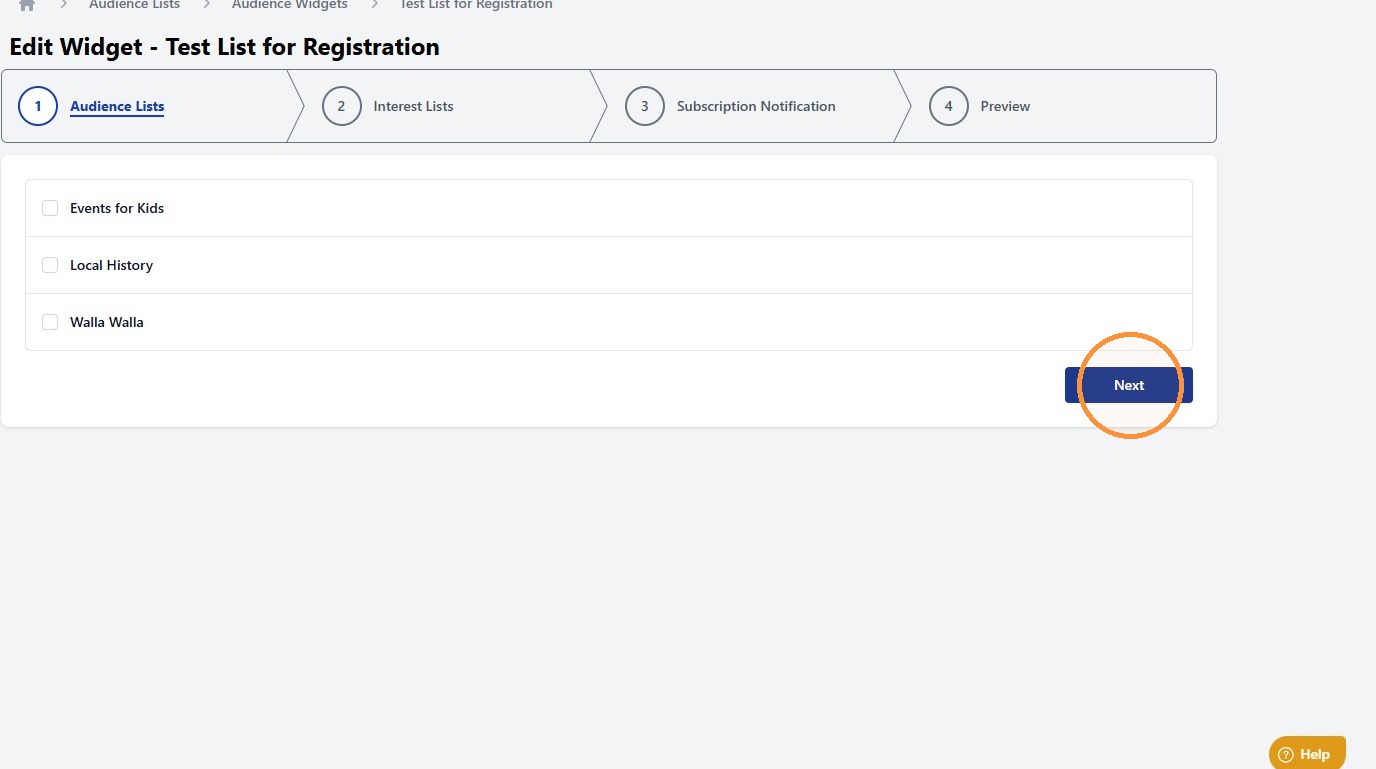
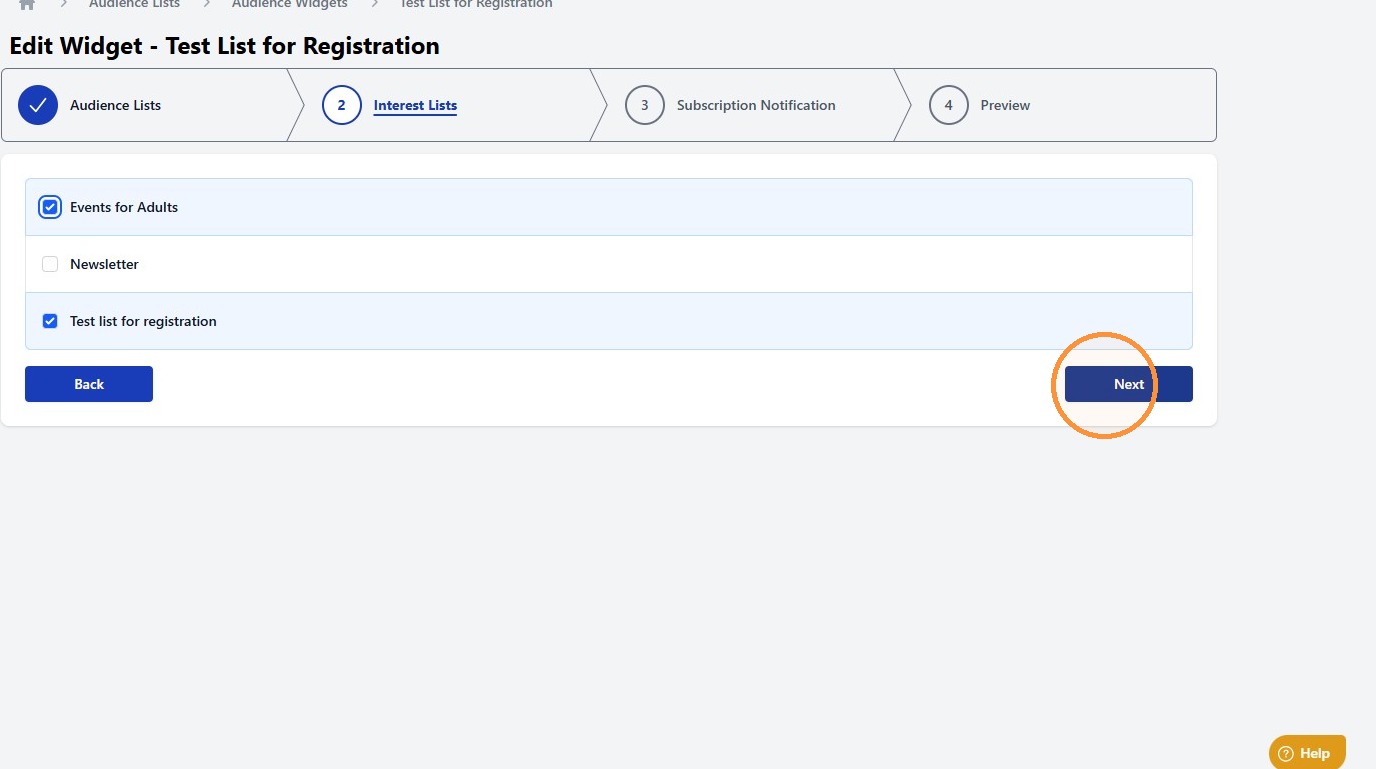
10. Next you will need to tell the widget the Interest Lists you would like to make available through the registration process. Click Next until you reach the Interest Lists screen.
11. Select the desired Interest List(s). You may select multiple lists. Each selected list will be presented as an opt-in option during registration.
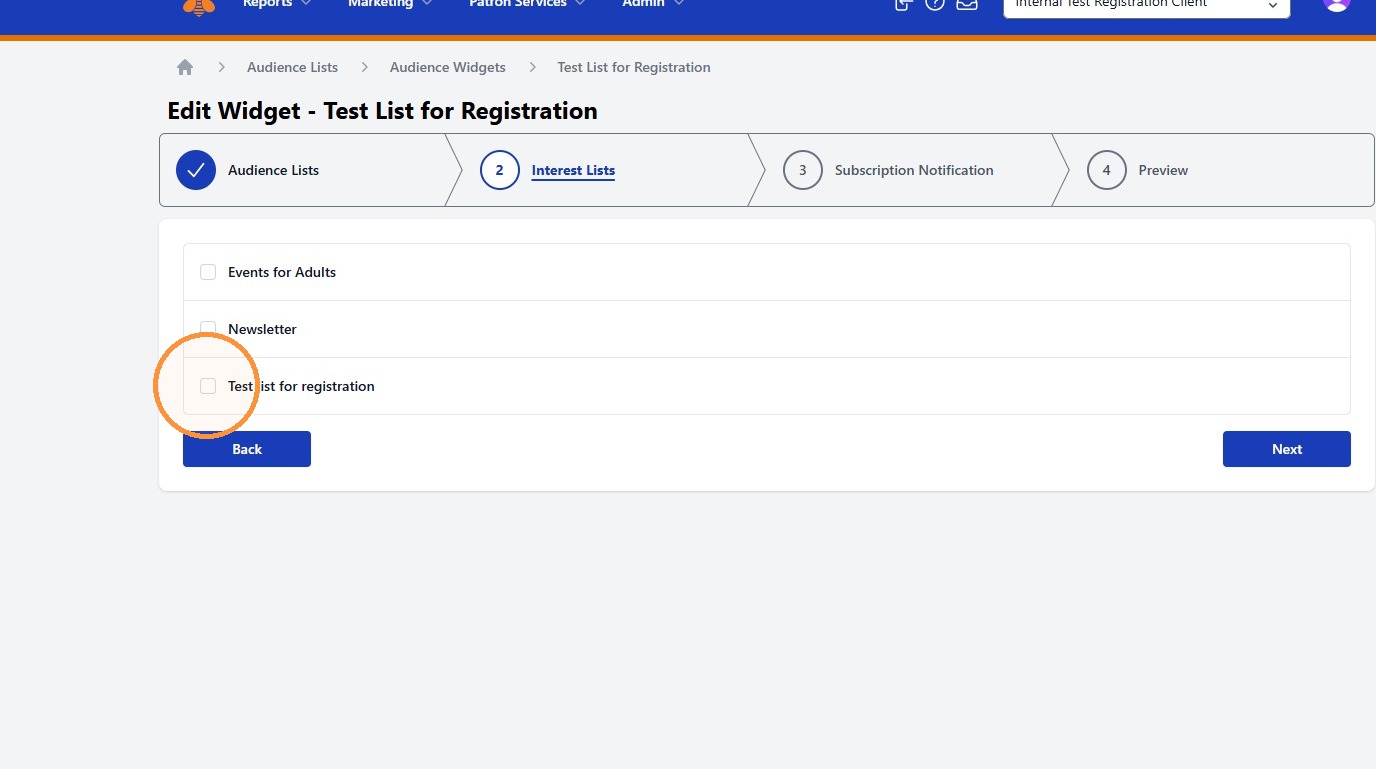
12. Once you have selected all desired lists, click "Next" to advance through to the Preview page.
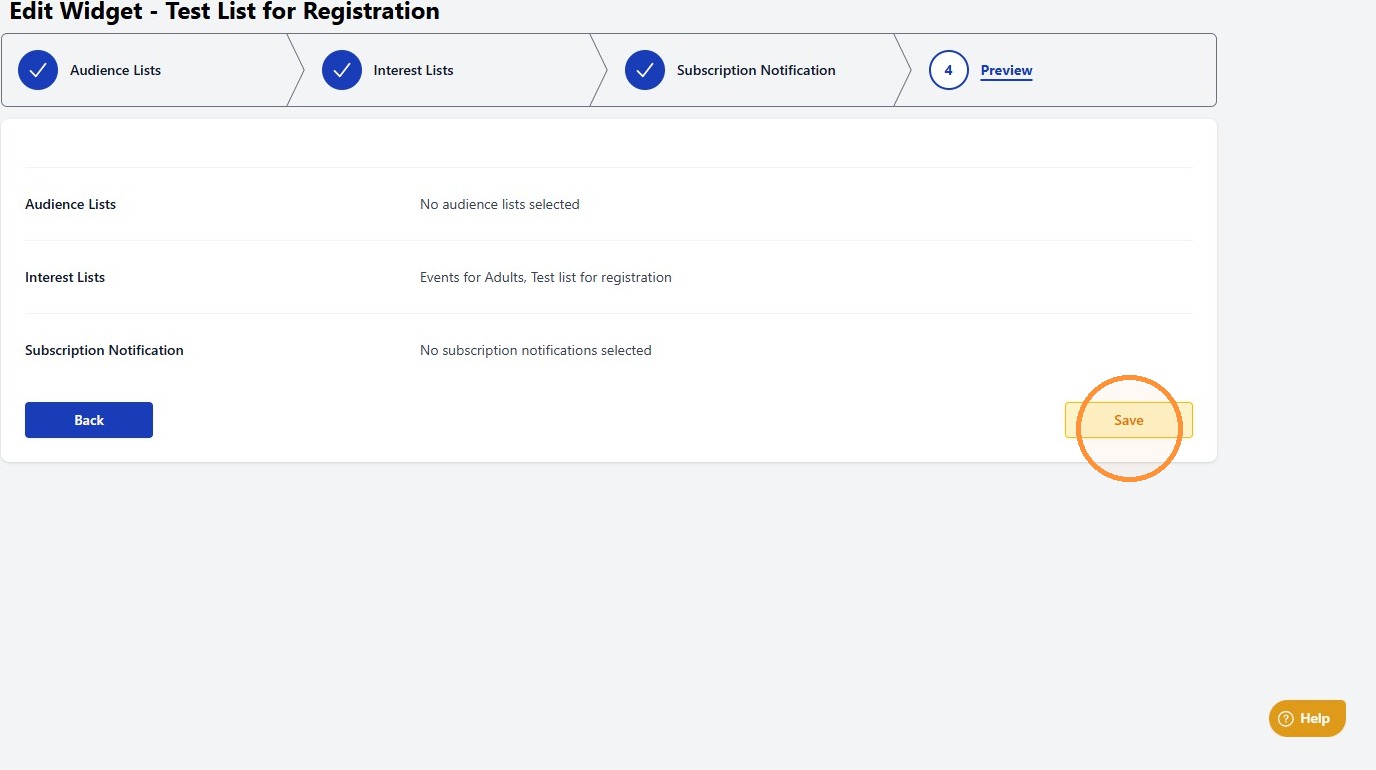
13. Review your selections to confirm that the correct Interest Lists are included, then click Save.
Important: Once the widget has been created and configured, please notify your Unique implementation contact or submit a support ticket. Unique must enable an additional setting before the Interest List options will appear in the registration workflow.
Registration Customization
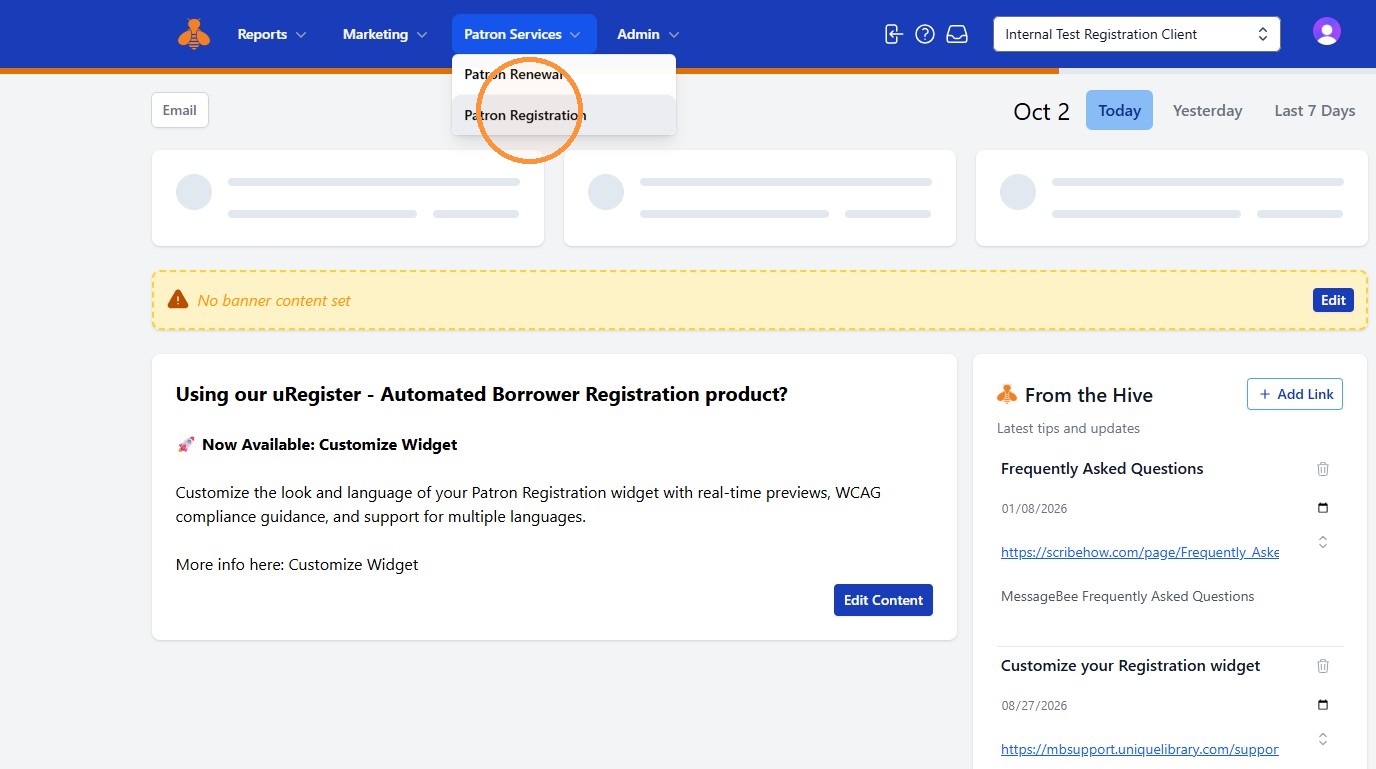
14. Navigate to Patron Registration.
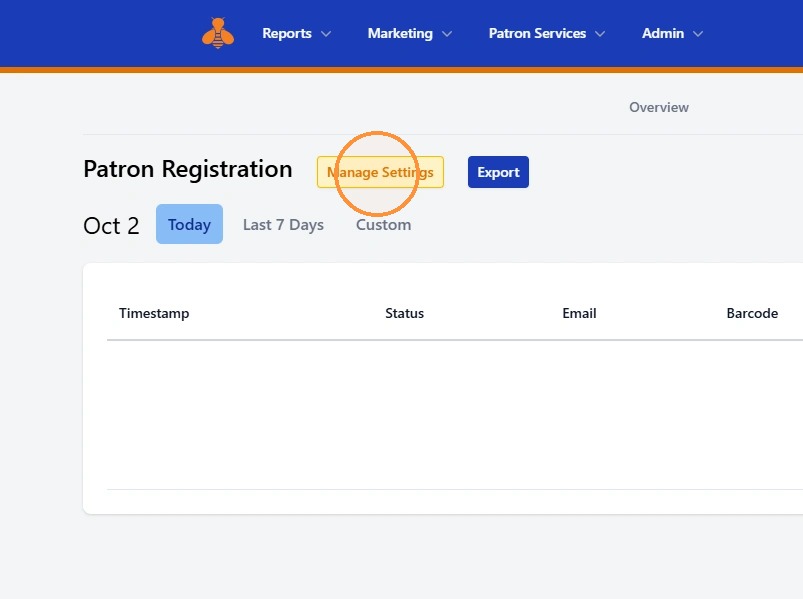
15. Click the Manage Settings button.
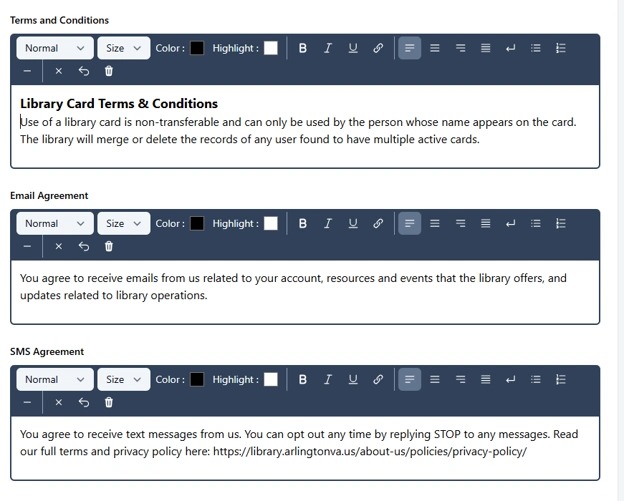
16. Select Terms & Conditions and scroll down to Email agreement. Add language explaining that patrons who provide their email address are agreeing to receive email communications and that they may unsubscribe from optional communications at any time.
Example: By providing your email address, you agree to receive email communications from the library, including account notifications, service updates, and other library-related information. You may update your communication preferences or unsubscribe from optional emails at any time.
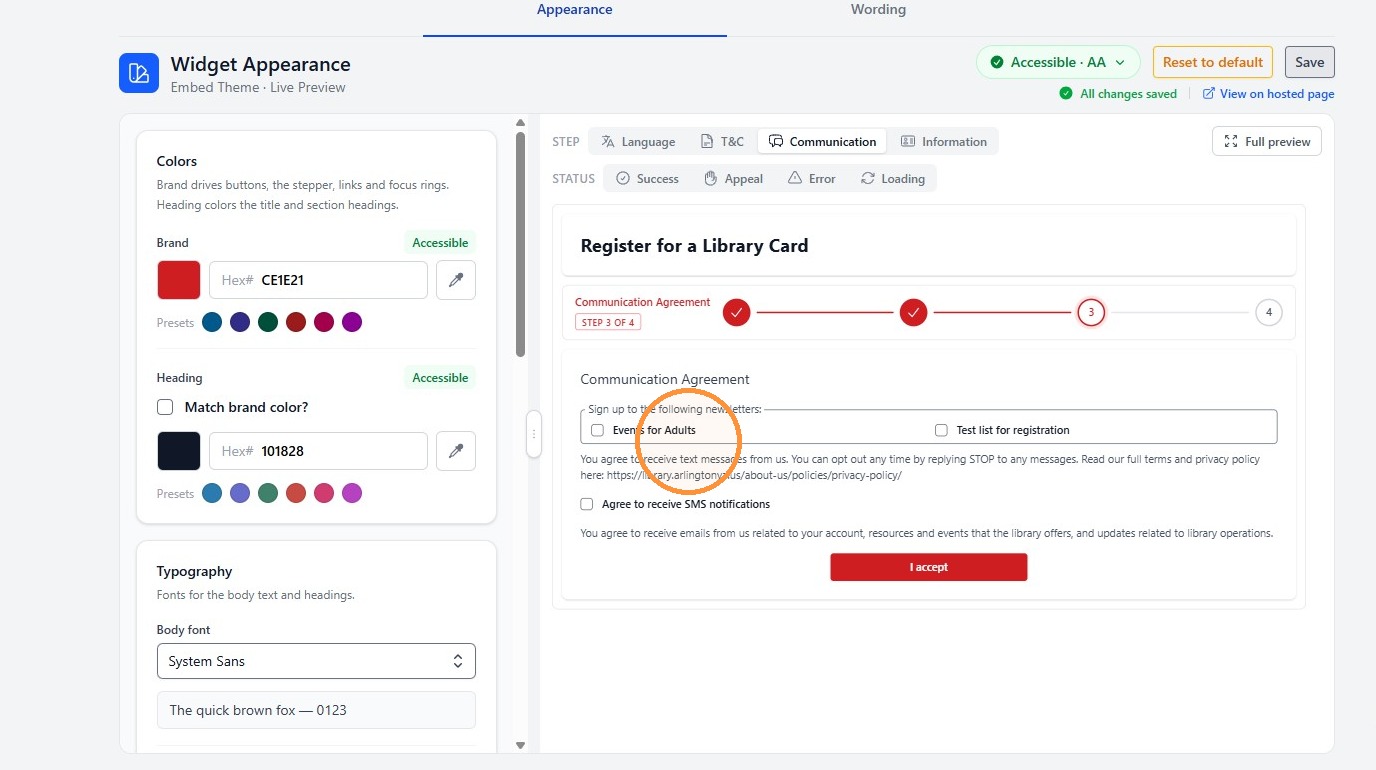
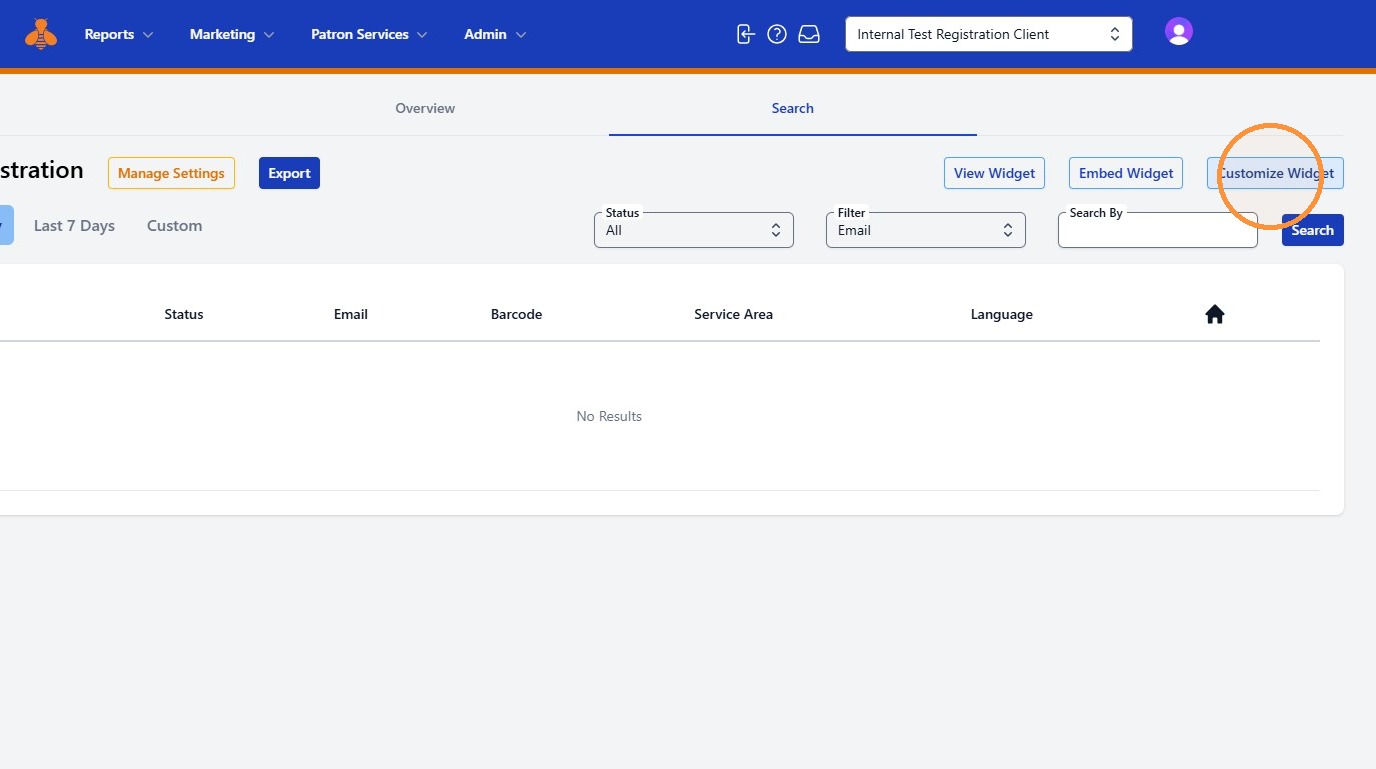
17. Once the configuration is complete and the required setting has been enabled by Unique, the Interest List options will appear in the Communication step of the registration process. To review how these options will appear to patrons, click Customize Widget.
18. Click "Communication"
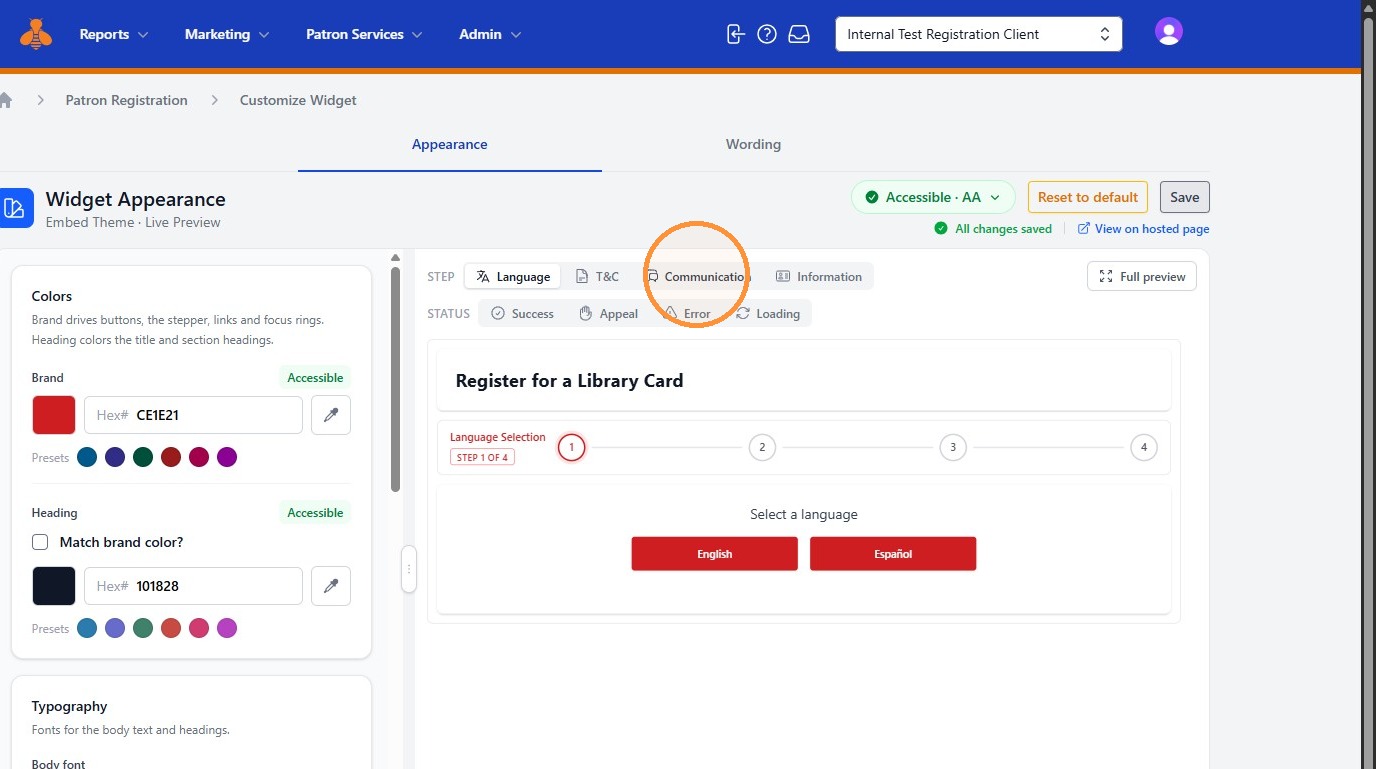
19. The selected Interest Lists will now appear as communication opt-in options, allowing registrants to choose the email communications they would like to receive.